|
|
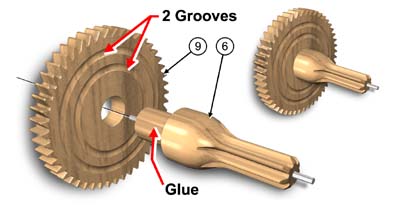
 PAGE 1. MIDDLE SHAFT
- Apply a small amount of glue on shaft #6.
(Shaft #6 has 7 teeth).
- Insert into gear #9 so that the 2-grooves on the gear
are facing forward.
- Push tight against the shoulder.

|
|
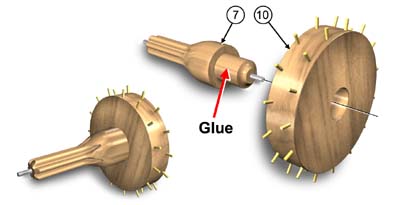
PAGE 1. TOP SHAFT
- Apply a small amount of glue on shaft #7.
(Shaft #7 has 6 teeth).
- Insert into sprocket #10. Push tight against the shoulder.
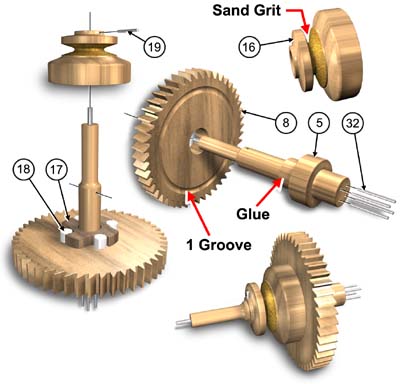
PAGE 1. BOTTOM SHAFT
- Coat the inside of the "V" groove of clutch pulley #16
with a thin layer of glue using a small paint brush.
- Sprinkle the fine sand grit (supplied) onto the glued
surface.
- Let dry, then dab a thin coat of glue over the grit to
secure the grit.
- Push (4) pins #32 into shaft #5 leaving 1/2" sticking out.
- Insert shaft #5 into gear #8 so that the groove on the
gear is facing forward. Push tight against the shoulder.
- Dab a small amount of glue on one side of spider #17
as shown.
- Slide over shaft #5 and press firmly to the back of
gear #8.
- Stand (4) clutch rollers #18 around clutch spider #17.
DO NOT GLUE THEM.
- Slide clutch pulley #16 over rollers and spider and test clutch.
- It should rotate in one direction only.
- Insert pin #19 into hole in shaft #5.
|